The backswing is the section in your golf swing that brings the club to the top of your swing after the takeaway. It’s the part of the swing that is often rushed and where golfers start going out of plane from their swing.
From my years of experience in golf and taking on multiple lessons, I’ve determined that the perfect backswing follows these main checkpoints:
- The club is brought back slowly
- Left arm remains straight
- Backswing Stays on Plane
- Biceps Stay Connected to the Chest
- Shoulders Open With The Hips
- Loading Up on the Trailing Hip
- Head is Centered and Level
1. Keep the Backswing SLOW
Our golf coach asked us: “Do you write with better penmanship going as fast as possible or slow and controlled?”
The answer is slow and controlled.
The same concept applies to your golf swing backswing (see Hideki Matsuyama as the best example). Keeping your backswing slow gives you more control, letting you follow every piece of our backswing advice much easier.
2. Left Arm Remaining Straight
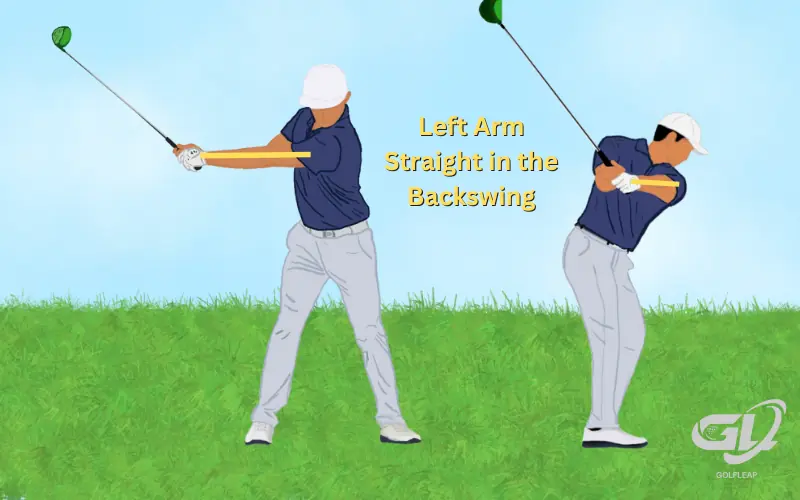
A lot of the backswing in golf is dictated by keeping your left arm (or arm closest to the target) as straight as you can throughout your entire golf swing motion from start to finish.
Your left arm remaining straight keeps your backswing from getting overly long, which causes most amateur golfers a serious lack of control and consistency.
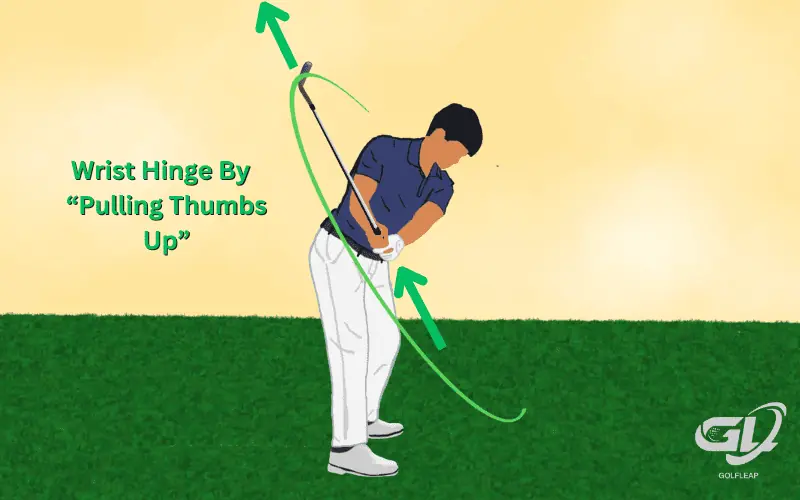
3. Hinge Your Wrists Upwards By Pulling Up Your Thumbs

As your arms and club begin traveling during the backswing, you must also hinge your wrists to help you generate as much power as possible.
As your hands pass your trailing leg (leg farthest away from the target) think about hinging your wrists upwards, as if you were praying and pulling your thumbs towards you.
Another helpful thought/feeling for correct wrist hinge in the backswing is applying downward pressure to the pinkie of your glove hand.
Detailed Guide Here: Wrist Action in the Golf Swing
4. Backswing Stays on Plane
Two things help your backswing stay “on plane” (traveling on the easiest path for straight golf shots): Your Left Arm Remaining Straight and Hinging Your Wrists Upwards.
When looking at your swing on film (as you should be), try to find the club traveling up your trailing forearm in the backswing. This is the checkpoint we use that tells us our backswing is on plane.
Of course, we need to match these two actions with the correct body rotation body and leg movement which we cover more below.
Detailed Guide Here: What is the proper swing plane in golf?
5. Biceps Stay Connected to the Chest
Tommy Fleetwood (one of the best iron players on the planet) says he feels pressure in his right armpit before starting his backswing.
This feeling helps keep his golf swing “more connected,” meaning more repeatability and less likelihood of overswinging.
A great practice is placing a spare golf glove under your trailing armpit and trying to keep it there during your backswing!
6. Your Knees Should Change Flexion
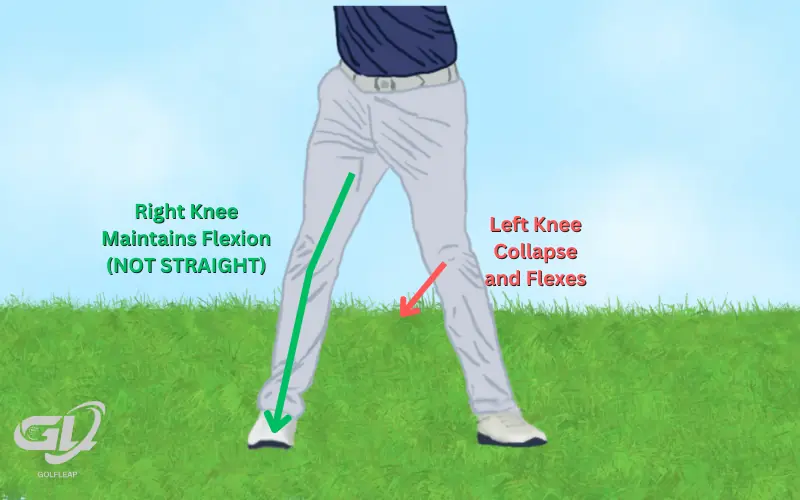
Proper golf posture dictates your knees should be slightly flexed when you create your stance.
As your backswing occurs, your left knee should collapse as your right knee keeps its flexion. This step helps with the following step of using your hips properly in the backswing.
Detailed Guide Here: Proper Golf Posture
7. Shoulders Open With The Hips
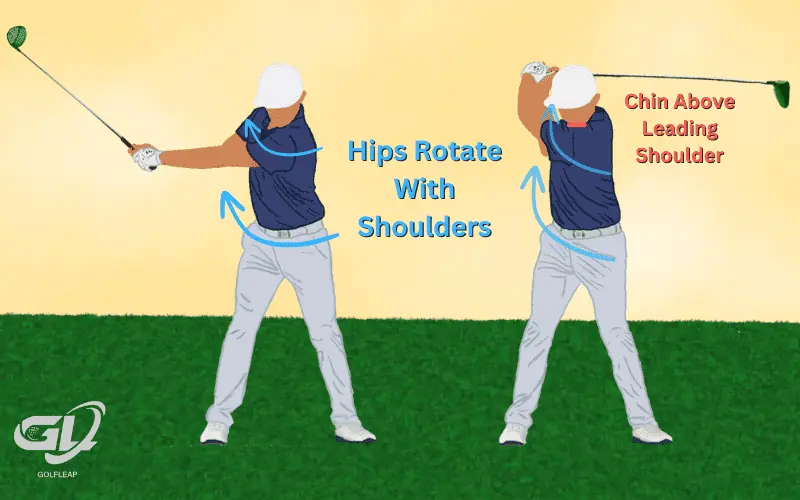
Your shoulders will always have a greater natural range of motion than your hips. As your backswing occurs, your shoulders rotate simultaneously with your hips.
When we think about our shoulders opening, we think about our right shoulder getting directly behind our head and our leading shoulder getting directly underneath and in contact with our chin.
8. Hands Go Over Your Trailing Shoulder to End Your Backswing
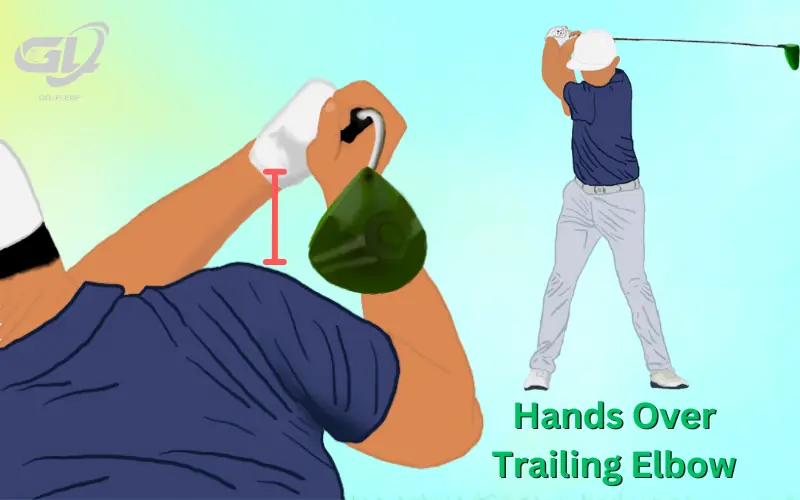
As we described in the previous step, your shoulders must rotate properly to ensure your backswing is as efficient and powerful as possible.
When we’re reviewing our golf swing on film, the #1 thing we look for is our hands above our trailing shoulder at the ending position of the backswing.
Another helpful hint is your leading arm remaining straight and matching the angle of your shoulders.
9. Loading Up the Trailing Hip
As your right elbow (for right-handed golfers) passes your trailing hip in the backswing, your trailing hip should be rotating behind your backside as your leading hip rotates in front of your body’s center.
Golfers that sway rather than rotate their hips properly usually have poor contact.
Imagine twisting a rubber band. That’s what you’re doing with your hips, and this is what gives our golf swing the energy it needs for power!
10. Keep Your Head Centered and Level
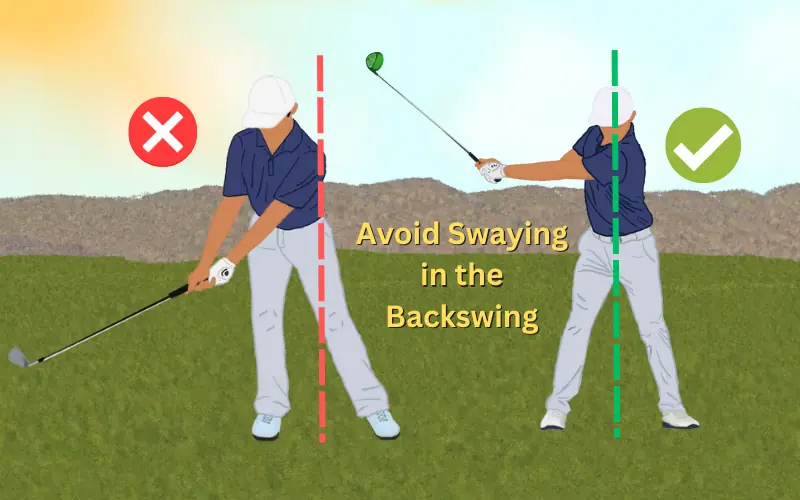
To help us avoid swaying off the golf ball during our backswing, we focus on keeping our head centered and level (not raising or dipping while the backswing happens).
Of course, it’s impossible to keep the head perfectly centered and level during the backswing, but maintaining a relatively similar head position from setup to the backswing will significantly improve the precision and consistency of your striking.
Besides just focusing on this feeling, we have a fantastic drill for this tip at the end of this article!
Golf backswing Drill
The single best drill you can practice to help your backswing is the “Head on the Wall Drill.”
We might’ve despised this drill as junior golfers, but we now thank our coaches who forced us to master it!
- Begin by facing and standing a few inches away from a wall while creating your traditional stance and pre-swing set-up.
- Lean forward until your head is gently resting against the wall.
- From there, practice your backswing and downswing motion while ensuring your head doesn’t move and maintains its original pressure on the wall.
Frequently Asked Questions About the Golf Backswing
The backswing only takes a fraction of a second but clearly requires a lot of body parts and motions to work in the correct sequence to create the most success.
Here are our answers to some of the most commonly asked questions about the golf swing’s backswing.
The primary difference between the iron swing and the driver swing is the length of the shafts in these golf club categories.
Since a driver has the longest shaft in your bag, it’s very easy to unknowingly swing it faster during the backswing than iron swings or sway away from the ball trying to generate as much power as possible).
Follow each of our above tips regardless of which club you’re swinging, with a special focus on remaining slow and controlled!
Due to the length of the driver, you may rotate your shoulders and hips incrementally more than iron swings, which is no problem as long as it doesn’t get too severe!
Which is better? A long backswing or shortened backswing?
Every golfer has a different level of upper body flexibility (a main contributor to your backswing’s length).
John Daly’s flexibility is much greater than Jon Rahm’s, leading to their drastically different length backswings.
A shorter backswing often leads to more control and accuracy, while a longer backswing generates more power by creating more energy.
