The takeaway is the first half of your backswing from the initial pre-swing setup to when the club reaches parallel with the ground at the same level as your trailing hip.
Beginning your golf swing with a technically sound and well-executed takeaway prepares your swing to create more consistent, reliable, and accurate shot-making. The most common problem-causing issue we notice in amateur golfers is a poor golf swing takeaway that causes their body to influence other swing mechanics accounting for this swing fault badly.
To start a the takeaway correctly, follow these steps:
- Create a Low & Slow Takeaway With The Target Line
- Hinge Wrist After Your Hands Pass Your Trailing Leg
- Trailing Hip Turns As the Hands Passes Your Foot
- Keep Your Lead Arm Straight Throughout the Takeaway
- Point the Butt of the Club At Target as the Takeaway Ends
1. Create A Low & Slow Takeaway With The Target Line
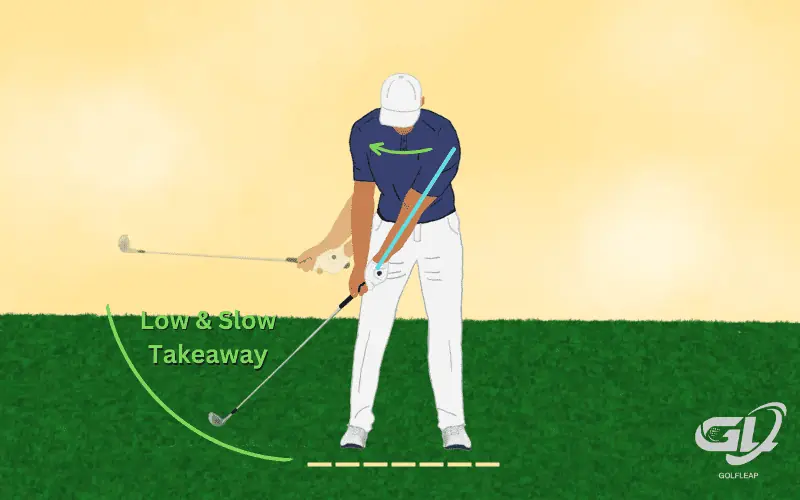
For the first physical movement of the takeaway, slowly, and calmly move the club directly backwards using your shoulders while keeping the club head low to the ground on your target line (or the imaginary line created between your clubface and your intended target).
Focusing on keeping the club head low to the ground helps reinforce a straight left arm during the backswing while remembering to slowly move the club backwards on your target line keeps the club traveling on the best backswing path to produce naturally straighter shots.
Detailed Guide Here: Where to Position the Club During the Takeaway
2. Hinge Wrist After Your Hands Pass Your Trailing Leg

By using our shoulders and bigger muscles to begin our takeaway, we’re generating more power into our golf swings from the very start.
Once our hands pass our trailing leg (moments after starting the takeaway) we should feel our trailing wrist hinge upward while our leading wrist remains straight. We do this by adding downward pressure at the butt of the club.
Hinging your trailing wrist upward will naturally bring the club toward your body and keep it moving on its intended swing plane, or path of least resistance to and from the golf ball through impact for naturally straighter results!
Detailed Guide Here: Golf Swing Wrist Action
3. Trailing Hip Turns As the Hands Passes Your Foot
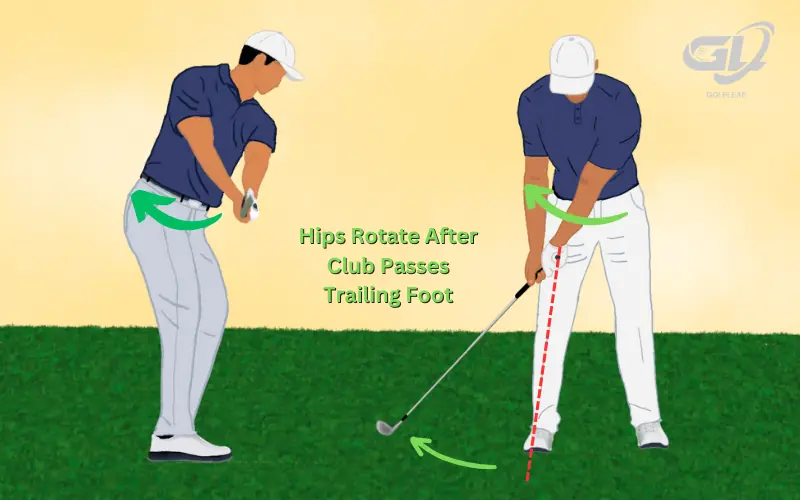
Your hips should start to rotate in the direction of your backswing during the takeaway to help you generate more power and greater general bodily mobility.
In most cases, we should ignore the hip turn-up until the club head points towards our trailing foot. After that point, your trailing hips should begin to rotate directly behind you as your leading hip rotates directly underneath the center of your body.
4. Keep Your Lead Arm Straight Throughout the Takeaway
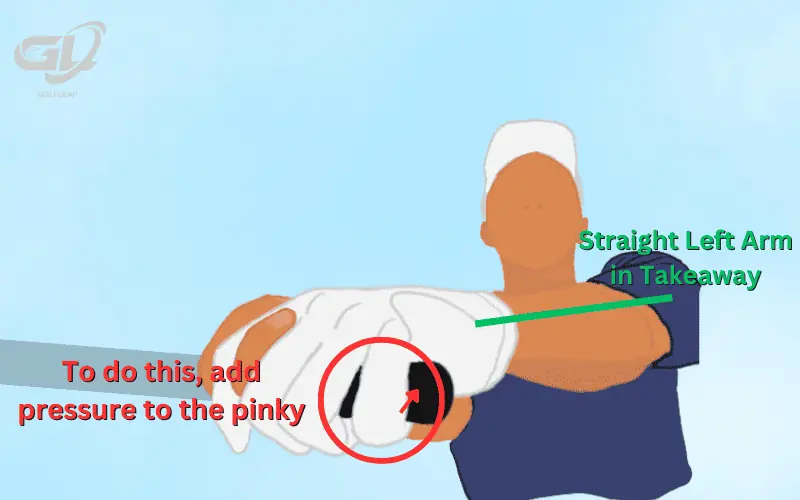
Keeping your left arm straight during your takeaway emphasizes creating a full shoulder turn (or more upper body rotation during the backswing) which allows a golfer to use all their power most efficiently!
Doing so also helps maintain the famous triangle between our hands and our chest, while allowing our right arm to remain straight and loose. Forcing the right arm to be straight will lead to an over-the-top swing path.
A helpful trick we use to maintain a straight left arm is pushing downward with the pinkie of our leading hand throughout the backswing. This move also forces your trailing hand to do all the hinging during the backswing, which helps maintain a flat leading wrist and a more repeatable golf swing simultaneously
5. Point the Butt of the Club At Target as the Takeaway Ends
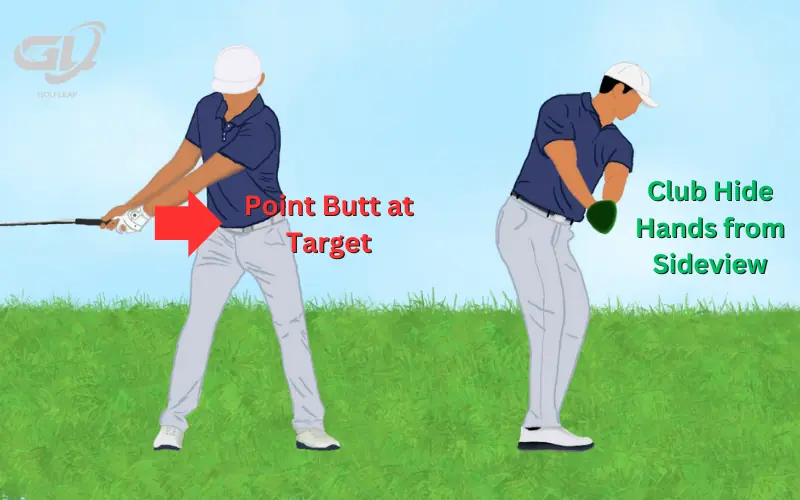
When we reach the end of the takeaway, we check that the butt/ shaft of the club is pointing at the target. A good checkpoint for the ending position of your takeaway is when the club reaches parallel with the ground and the club head hides your hands with its face angle matching the angle of your spine while the points towards the sky.
This means your club face is positioned appropriately at the end of the takeaway for naturally straighter, more consistent shots at your target!
Golf Swing Takeaway Drills
We try avoiding only recommending drills that require a golf course to execute, so this takeaway drill for a better backswing can be practiced at home so you can make swing gains from anywhere!
The Feet Line Drill
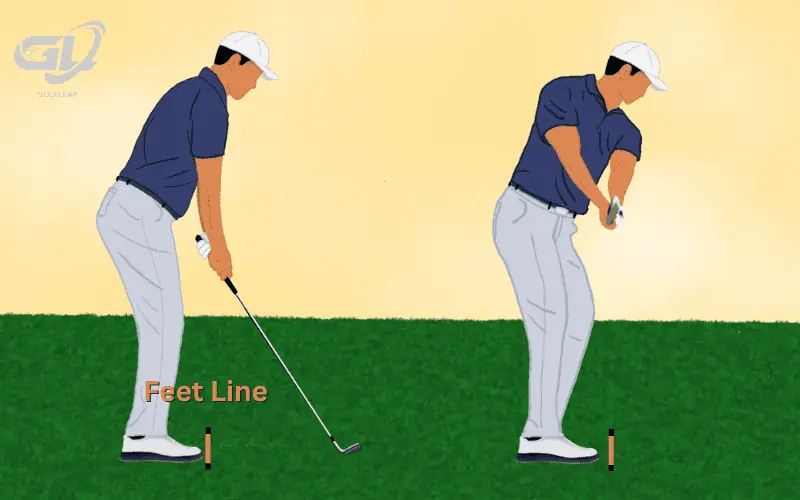
Needed for Drill: Alignment Stick, Golf Club
- Choose a target at a distance and create your normal stance pointed at said target.
- Put your alignment stick on the ground signifying your “feet line” (where your feet are aiming).
- A perfect golf backswing takeaway begins with the hands moving backwards on this “feet line.”
- *Golfers with an inside takeaway will have their hands move inside the feet line immediately.*
- *Golfers with an outside takeaway will have their hands move outside the feet line instantly.*
- Once the club is parallel with the ground, it should also be on top of your feet line (ideally with the clubhead hiding the hands as I demonstrate above)
This is our favorite takeaway drill because it gives our eyes an ideal visual marker (the feet line alignment stick) that helps us keep our hands moving on this path to create our ideal takeaway position.
