Executing the golf swing correctly requires a set of complex and detailed movements throughout the body to hit the perfect golf shot. In this guide, we will provide illustrated tips and instructions for each stage of the golf swing sequence so you can do just that.
We’ll be covering the pre-swing (the grip and setup), the golf swing sequence (from the takeway to the follow-through), common mistakes to avoid, and more advanced swing techniques that will help you hit the ball harder without sacrificing consistency. We’ll also have a golf swing in slow-motion to help guide you while you read through!
Take what you learn here into your daily practice at the course and you’ll be hitting low digits in no time.
Table of Contents
Start with The Fundamentals: The Pre-Swing
The golf swing involves more than just the motion itself but also the grip, setup, and aim. We’ll cover these fundamentals first before jumping into the actual golf swing sequence.
Finding the Correct Golf Grip
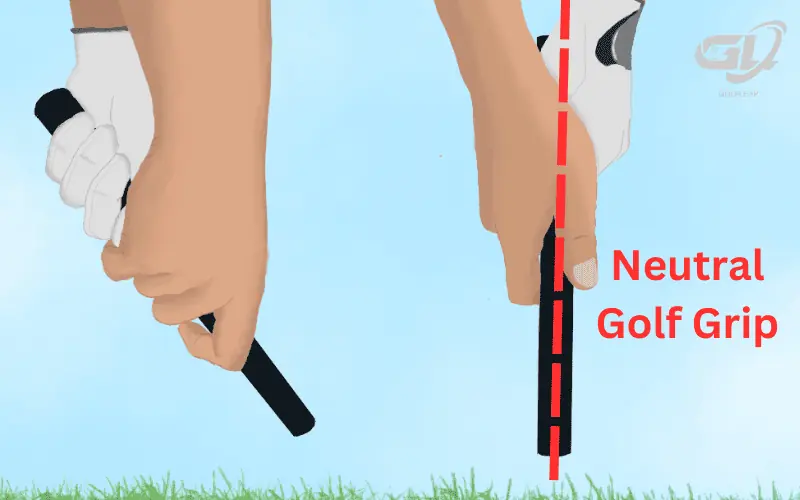
Finding your golf grip style is key to better control over the club face during the golf swing. For most beginners, a neutral interlocking grip provides the optimal blend of control and flexibility, setting the stage for a consistent, fluid, and squared golf swing. We set this grip by interlocking our right pinky with our left index finger and ensuring both hands are symmetrical when holding the grip from both sides.
Detailed Guide Here: How to Grip a Golf Club
Establishing A Good Golf Setup
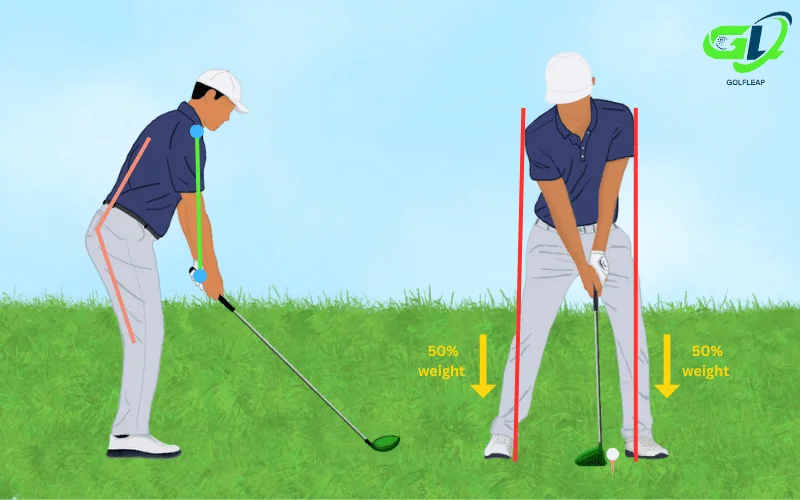
The golf setup is another pre-swing routine that goes beyond just your stance and posture; it also includes the distance you should have from the golf ball and your alignment with the target.
The most basic set-up position has your feet shoulder-width apart and slightly flared out and your weight evenly distributed between your feet. With the driver, however, your feet out by slightly wider than shoulder width.
Your knees should bend just slightly, your upper body should lean just an inch or two forward from the hip, and your back should remain relatively straight. Let your arms hang naturally with the golf club while meeting the clubface squared to the ball. Make sure your feet and target line are parallel and pointed towards your target.
Detailed Guide Here: Golf Setup Guide
How to Swing the Golf Club Perfectly
The golf swing has multiple sequences or ‘phases’ to it: the takeaway, the backswing, the top of the swing, the downswing, the impact position, the release, and the follow-through. Understanding each phase of the swing will help you swing the golf club properly and injury-free. Here’s how
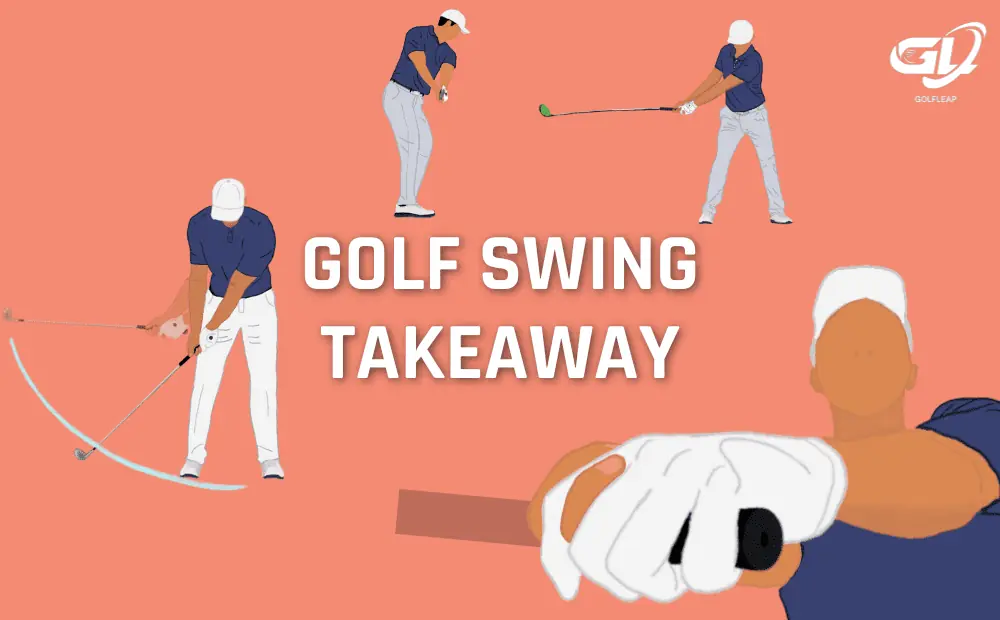
1. Begin With the Takeaway
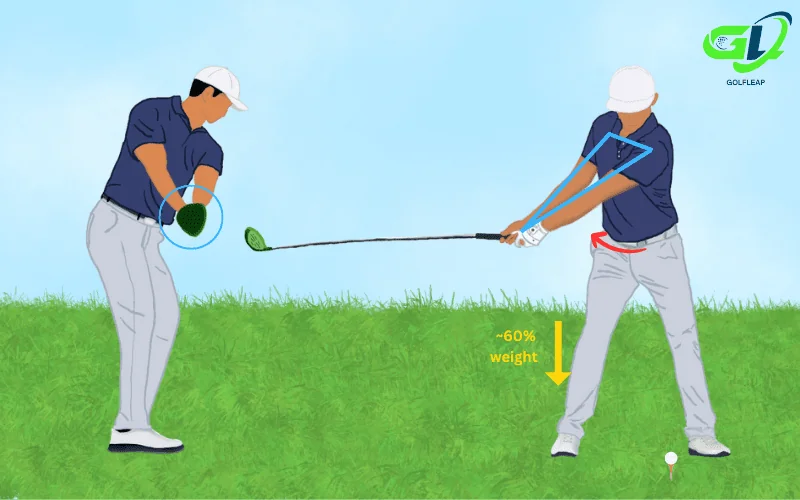
The takeaway (also known as the first half of the backswing) initiates the golf swing and ends when the shaft is parallel to the ground while leveled at your hips. A proper takeaway has a massive influence on the quality of your swing plane and tempo which ultimately determines how pure and consistent you hit the ball centered on the face each time.
Begin the takeaway by moving the club backward through the rotation of the upper body. You’ll notice right away that your left shoulder gets closer to the bottom of your chin. After that, incorporate a slight hip turn in the later half of the takeaway while maintaining a straight left arm. By the end of the takeaway, the shaft should be parallel to the ground, the butt of the grip should point at the target, and the toe edge of the club should be pointing towards the sky and angled slightly away from the body.
Detailed Guide Here: Takeaway Tips
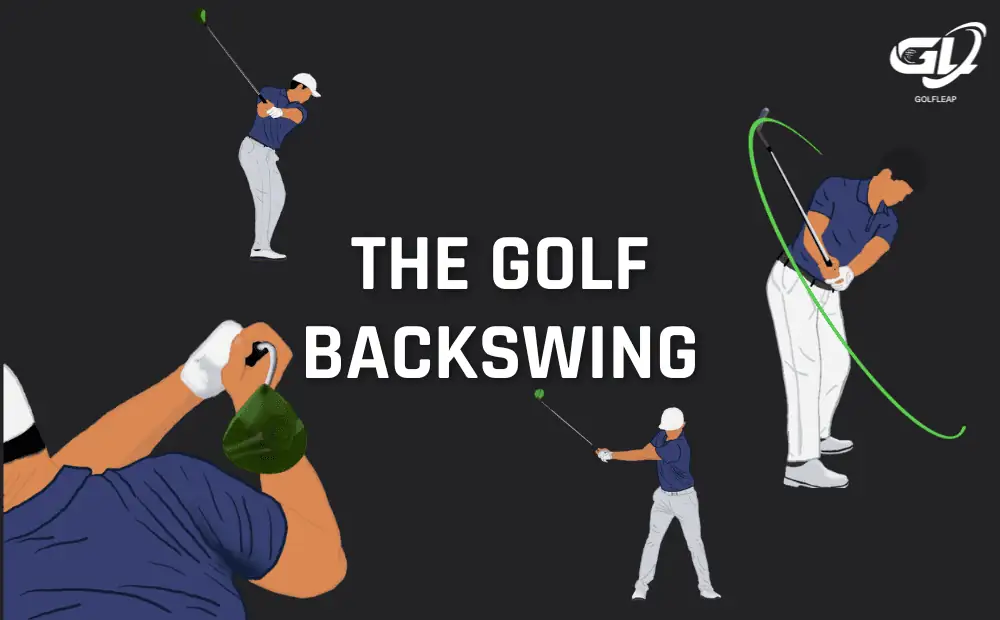
2. Complete the Backswing
The second half of bringing the club up is the backswing which emphasizes the rotation of the hips, torso, and shoulders while bringing the club to the top. Throughout this motion, you’ll progressively shift your weight onto your right foot; the right knee keeps its flex, and the left knee angles towards the ground perpendicularity. During the rotation, it’s important to rotate along the same spine angle from the setup. The end of the backswing is reached when you’ve stopped coiling your hips and shoulder backward (not necessarily based on where the club should be).
Most beginners tend to overswing the golf club during the backswing or take back the golf club too quickly, these swing flaws should be avoided as they disrupt the coordination between your upper and lower body, making it almost impossible to have an in-sync downswing.
Detailed Guide Here: Backswing Tips
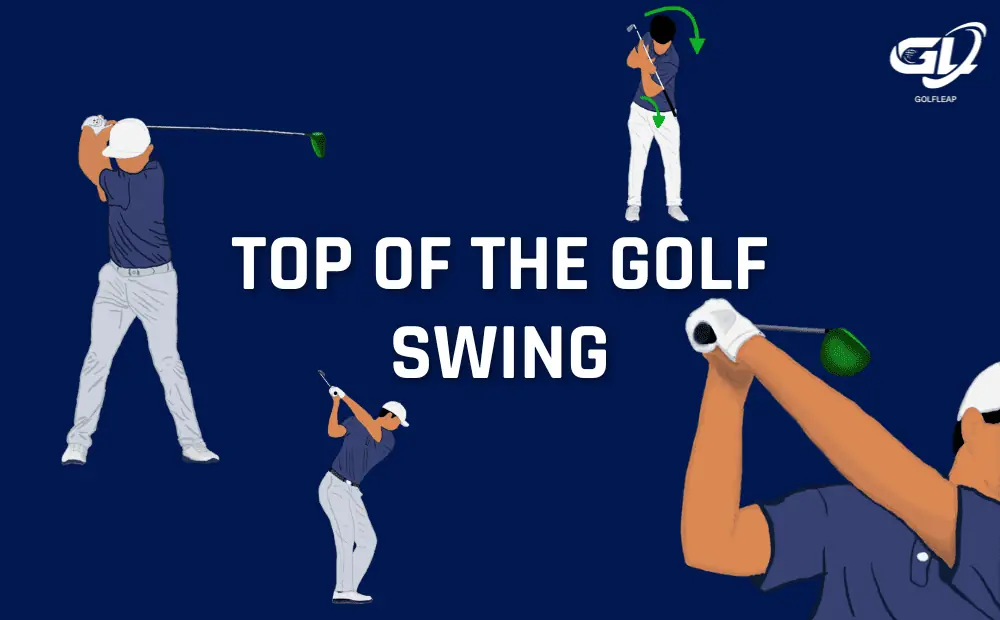
3. Establish a Stable Top of the Swing Position
The top of the swing is reached at the end of the backswing and is the point where your hands have reached their highest point.
At the top, your shaft is relatively parallel to the ground, your chin is pressed to your left shoulder as it points to the golf ball, your left arm remains straight or at least relatively extended, your right arm holds a 90-degree angle, and your wrist is hinged with the clubhead pointing towards your target. Your hips, torso, and shoulders are properly turned, facing away from the target with 60% to 80% of your weight pressed into your right foot.
Golfers looking for more consistency should add a pause at this position before transitioning. This pause is crucial in setting the right tempo for your golf swing and will help generate more power and accuracy to your shots.
Detailed Guide Here: Top of the Golf Swing Position
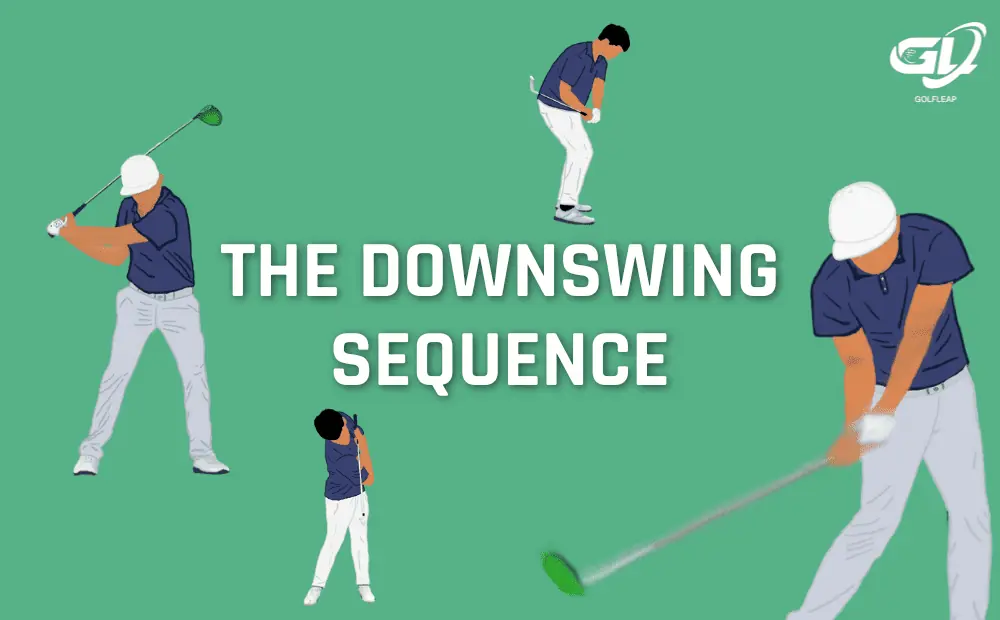
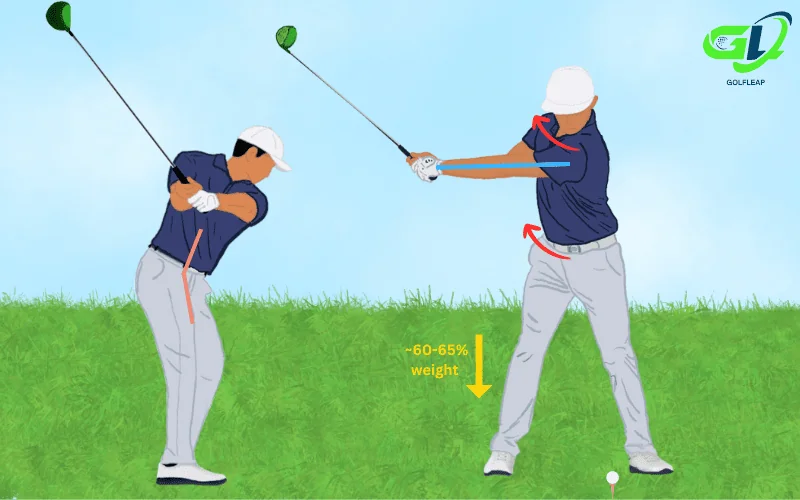
4. Begin the Downswing
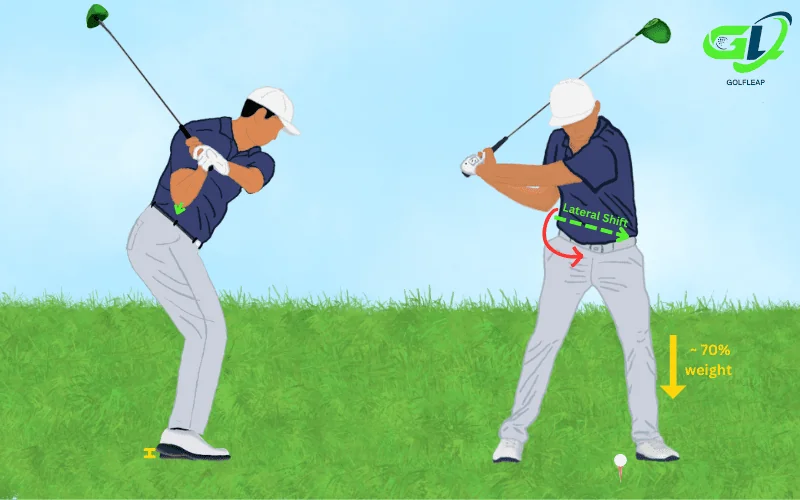
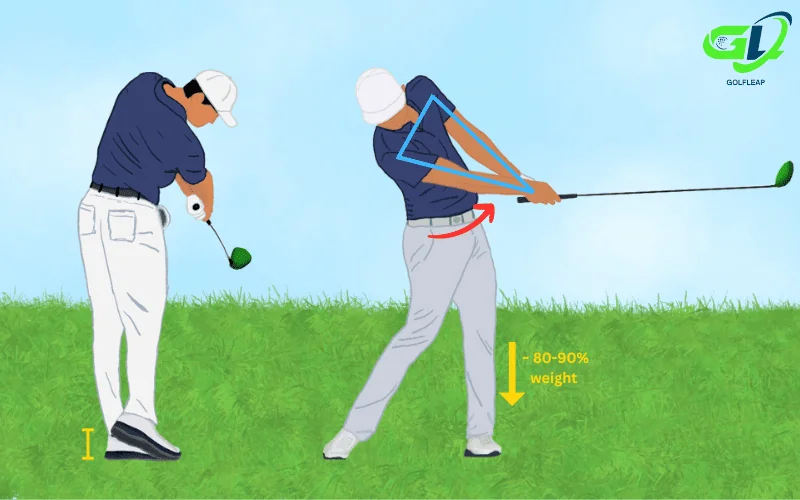
The downswing involves bringing the golf club down from the top of the golf swing. Here, the hips rotate in the direction of your target, guiding the hands to eventually make contact with the golf ball.
To start the downswing, initiate a simultaneous lateral pressure shift to the left foot while uncoiling the hips, followed by the torso, shoulders, and hands. As you’re coming down, feel your right elbow dig into your trailing hips to avoid going over the top and to keep your swing path on plane. Maintain the wrist hinge as long as possible until it’s time to release for impact. The lateral pressure shift will initiate the majority of your weight to the left foot where the rest of your weight will progressively shift over as you complete the downswing.
Golfers must avoid bending the hips towards the target, but learn to rotate along the spine angle of their golf swing instead.
Detailed Guide Here: Downswing Tips
5. Make Impact With the Golf Ball
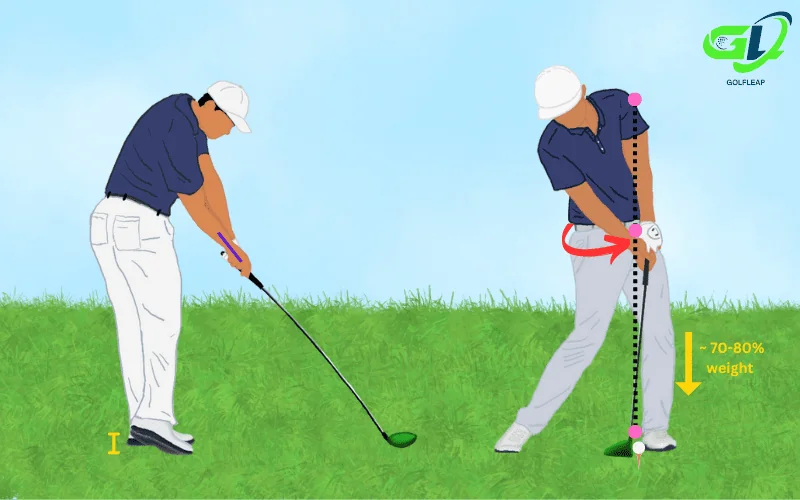
The impact position marks the critical moment of making contact with the golf ball and is an integral part of the downswing. This is also where the clubhead speed should be at its fastest.
Depending on the golf club, the angle at which you strike the ball may be different. For instance, woods have a positive angle of attack (hitting up on the ball) and irons have a negative angle of attack (hitting down on the ball).
Technique-wise, the wrist is unhinged completely and the hands should be ahead of the golf ball, ready to rotate the club face to make a squared and centered impact. The hips and shoulders have opened generously towards the target while you maintain a similar spine angle you had at address. Finally, the majority of your weight should be planted on the left foot while your eye continues to stay on the rear side of the golf ball. This set of movements creates the classic “Reverse-K” impact position.
Detailed Guide Here: Impact Position in Golf
6. Release the Golf Club
The golf swing release occurs after impact where the path your hands follow in the release will play a massive role in the type of golf shot you produce.
During the release, the ‘crossing over’ of the hands has ended which has the right hand positioned in front of the left hand compared to before impact. At the release, both arms are extended and the swing path travels inward towards the same plane of your left shoulder all the way to the follow-through. The head remains in the same position as it was prior to impact but turns as the torso rotates to a point where it introduces a natural turning of the head with it.
Detailed Guide Here: Swing Release Tips
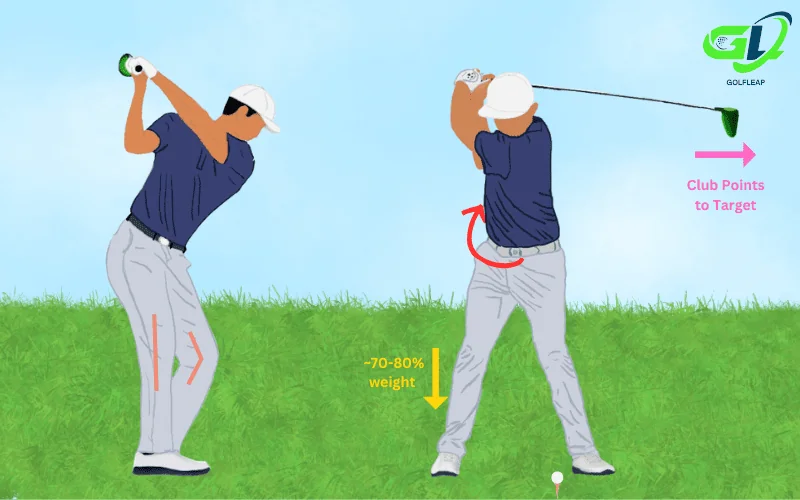
7. Achieve a Perfect Follow-Through
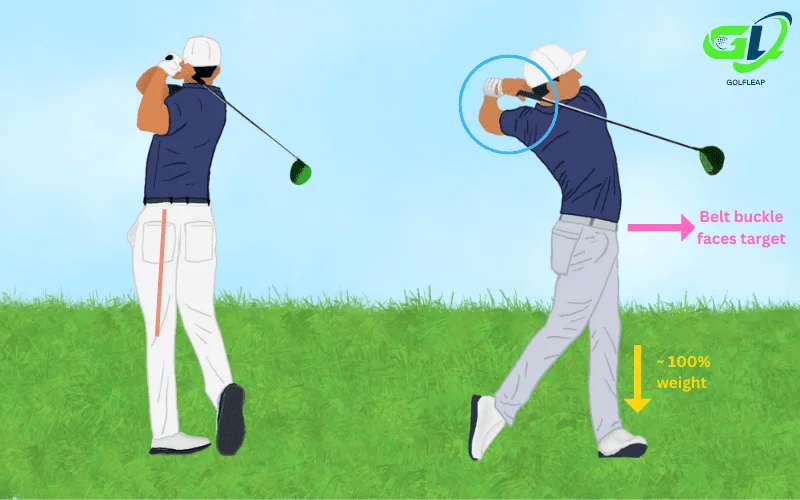
The follow-through of the golf swing is the final position of the golf swing. Many golf coaches often look to your follow-through stance to diagnose any swing problems you may have before reaching this point.
That said, we want to stand tall during our follow-through with our chest, hips, and face pointing at the target. Our weight is completely shifted to the outer edge of our front foot, our backfoot is supported lightly by our toes, and our hands are positioned somewhere above the proximity of our left shoulder. If you’re flexible enough, we want the head of the club pointing towards our target but this is not a must.
Detailed Guide Here: Follow-Through In Golf
Golf Swing in Slow Motion
More Advanced Golf Swing Techniques & Common Mistakes to Avoid
Understanding the Driver Swing Mechanics
What you’ve learned so far has prepared you to swing any golf club in the bag, but it’s important to remember that the driver swing has a few mechanics that are different from your irons or wedges.
With the lower loft and additional length of the driver, we need to adapt our set-up to allow us to hit up on the ball instead. To do that, we’ll add a slight side-tilt to our stance, and the gap between our chest and our hands becomes slighlty larger.
Detailed Guide Here: How to Hit a Driver
Incorporating the Hips in the Golf Swing Instead of your Arms
“Swing with the hips”, is the most iconic phrase in golf and it’s something golfers spend years trying to master. Truth is, if you’ve been following the swing tips so far, your hips will start to help with your golf swing naturally. However, we must do this correctly to benefit from the results it can provide. I recommend recording your golf swing to see if you’re actually swinging with your arms instead of your hips. Swinging with the arms leads to no consistency whatsoever, so make sure to incorporate some sort of hip rotation.
Finally, check that your hips are rotating and not bending during the golf swing. We want the hips to rotate properly to generate a consistent source of power and reduce unnecessary movement from the upper body.
Swing in Plane For Better Consistency
Ben Hogan’s swing plane illustrates an invisible flat surface a golfer follows during their golf swing to produce the ideal swing path for the clubhead. For most beginners who suffer from going over the top, following this plane is key to fixing their golf swing from an imminent slice. If we look at most professional golfers, their golf swing may look different but they always follow the same swing plane when making contact with the golf ball.
Like before, record your swing to see if you’re coming over the top!
Detailed Guide Here: What is the Golf Swing Plane?
Understanding Your Swing Style
On that note, given that every golfer has different body proportions, having the exact same swing form across every golf is impossible.
Understanding the type of golf swing you have is important to determine certain swing flaws you ought to avoid. For instance, golfers who bring the club higher at the top (known as ‘high hands’) must ensure they are bringing the golf club inside during the downswing to meet the ball squared at impact. In total, there are 5 iterations to the golf swing that are most common among golfers so do make sure to check which category you belong in.
Detailed Guide Here: Types of Golf Swings