
The impact position is part of the golf swing where your club makes contact with the ball and occurs after the downswing and before the swing release. It’s the section of the swing that demands speed but most of all precision.
Before golfers should consider hitting harder on the ball (with more speed), learning to hit centered on the face consistently is foremost.
Here’s what makes the perfect impact position to help you hit great quality golf shots:
- Hands Ahead of the Ball Through Contact
- Straighten Your Leading Leg While Maintaining A Trail Knee Bend
- Hips and Shoulders Arrive at Impact with a Photo Finish
- Downward Strike with Irons/Hybrids – Neutral to Upward Strike with Woods/Driver
- Straight Lead Arm and Tucked Trail Arm
- Form the “Reverse K” Impact Position
Hands Ahead of the Ball Through Contact
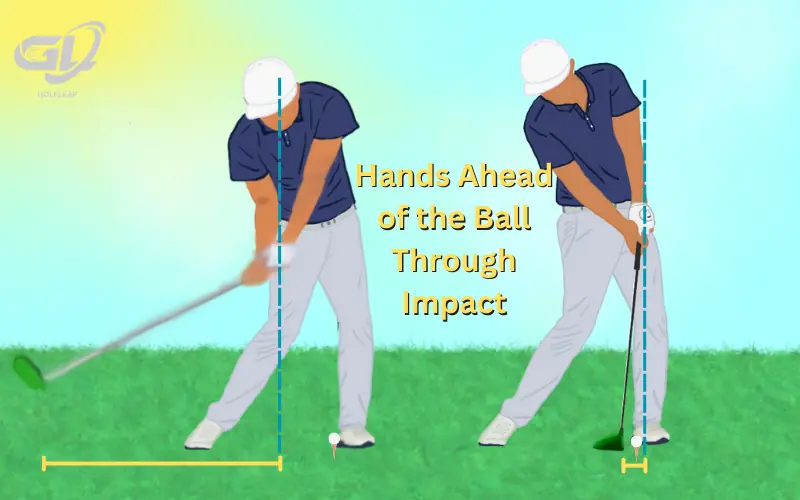
As you might’ve learned in our proper golf swing set-up guide, creating a slight “forward press” with your hands when building your stance and taking your full swing through impact helps you fully compress the golf ball for as much length as possible.
This incremental “forward hand press” move you’ll notice in better golfers mimics the “hands ahead of the golf ball” impact positioning we’re hoping to achieve.
Having your hands ahead of the ball through contact helps create square clubface, ball-first contact that uses your swing’s energy at the appropriate time for optimized efficiency, loft, and shot power!
Detailed Guide Here: How to set up to the golf ball
Straighten Your Leading Leg While Maintaining A Trail Knee Bend

While the bulk of this action is performed in your downswing, we can actually feel our leading hip pulling directly backwards and our leading leg straightening as we strike the golf ball.
This lower body action helps propel as much energy into the golf ball as possible to further maximize the power you experience with each golf swing.
Think about pushing yourself backward with your leading leg alone while sitting in a rolling chair.
This is the feeling you need to achieve during impact for optimized power and well-balanced weight distribution at impact simultaneously!
Hips and Shoulders Arrive at Impact with a Photo Finish
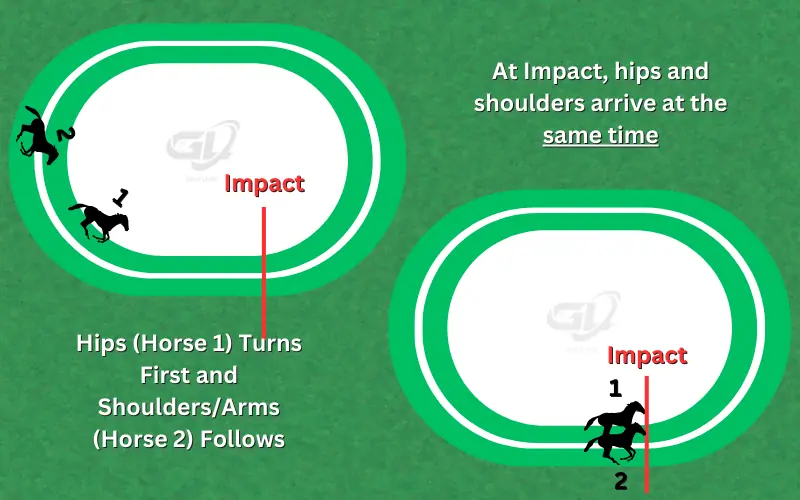
Our shoulders and arms naturally have a much larger and wider range-of-motion than our hips.
Imagine your arms/shoulders as a horse in the outside lane on a racetrack, and your hips as a Horse on the inside of a race track.
When we get to our impact position, we want both these “Horses” (our Shoulders/Arms and our Hips) to close and meet contact with a “photo finish” (meet simultaneously).
Our shoulders and hips meeting impact at the same rate helps us hit the golf ball straighter with more consistency and repeatability for lower long-term golf scores!
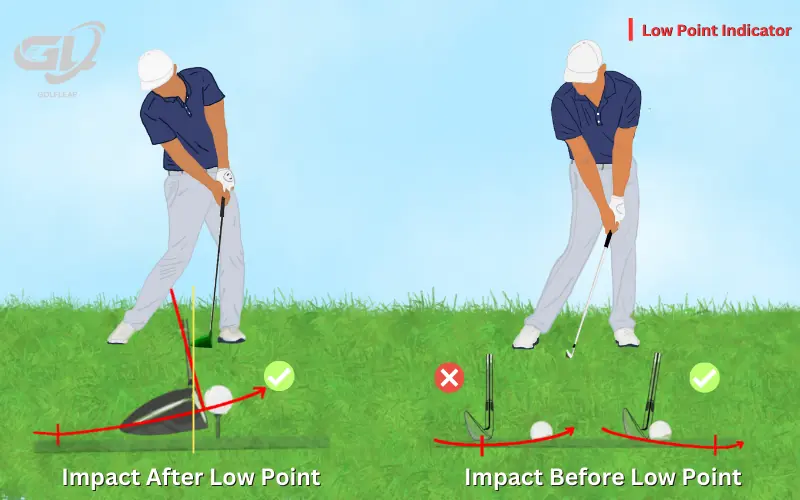
Downward Strike with Irons/Hybrids – Neutral to Upward Strike with Woods/Driver
We’re sure you’ve heard the phrase: “Keep your head down!” referring to the golf swing, but it’s absolutely true regarding the proper impact position!
Optimized impact position with irons is created when the clubface contacts the golf ball first, then bottoms out or experiences its lowest point to create your divot after the golf ball.
We personally feel a slight downward strike with irons to create this contact, and this feeling is aided by keeping our head down and centered over the golf ball as we complete contact.
Hitting up on the ball is only truly appropriate for fairway wood and driver tee shots when the golf ball is on a tee.
Straight Lead Arm and Tucked Trail Arm
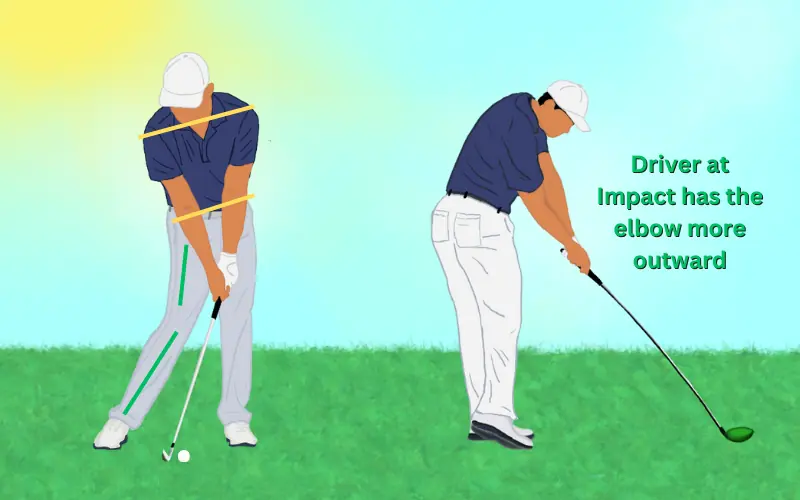
A straightened leading arm and tucked/slightly bent trailing arm at impact helps further ensure you’re releasing your swing’s energy at the appropriate time during contact for optimized power.
Following our previous tips for the proper impact position and downswing mechanics helps you achieve this straightened leading arm – tucked/bent trailing arm position with ease, but here’s a special tip we received as children from our first golf instructor:
“Imagine pointing the emblem on your golf glove toward your target as you make contact.”
Focusing on this thought/feeling helps ensure a straightened leading arm with a square clubface without even trying! Note for the driver, this is not always the case as we often have the ball slightly ahead of us, but the feeling should be relatively similar
Create the “Reverse K” Impact Position
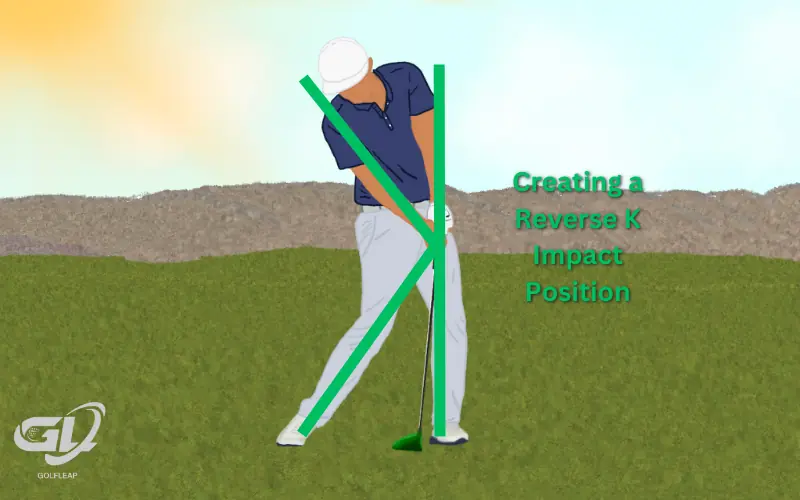
If you’re filming your golf swing (as you should from time-to-time to check your swing positions) from a face-on perspective, all our above tips combine to form the ideal impact position – a “Reverse K” with your body (as pictured above).
This “Reverse K” position demonstrates a strong planting of energy and weight into the leading leg while your arms/club/accumulated energy work as the driving force of your golf swing’s power into the golf ball through contact!
The upper arm of the Reversed K is created through a tucked trailing arm through impact, and the lower leg of the Reversed K is generated through driving your trailing leg toward your leading leg as you transfer your energy into the golf ball.
Golf Swing Impact Drills
The “Line Drill” Bryson DeChambeau’s Go-To Ball Striking Drill
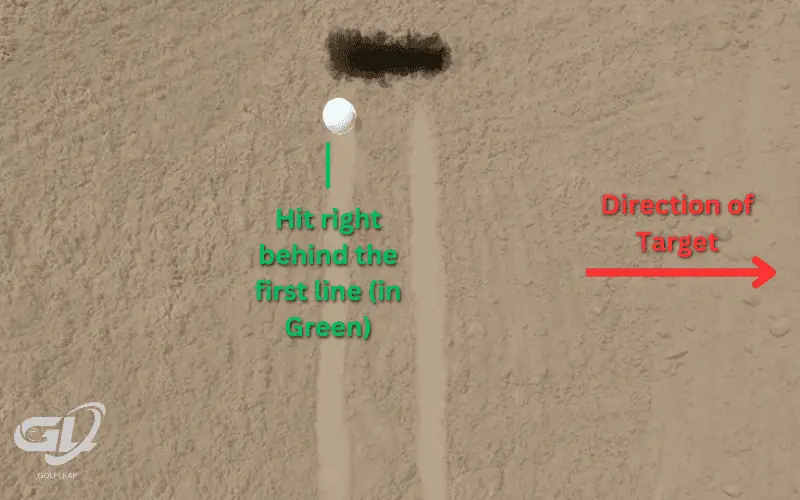
As we’ve made reference to in the past, knowing the “low point” of your golf swing (where and when the club bottoms out with the ground) is incredibly important to the contact quality and consistency you see on the golf course.
- Start this drill by drawing two visible lines in the ground creating a set of train tracks.
- Create your typical stance with the club resting just above the space between the two tracks, and take your normal swing.
- Focus on creating contact that splits the two tracks while ensuring the start of the divot is exactly aligned with the line closer towards your right foot, and you’re now training your golf swing low point like professional golfers like Bryson DeChambeau!
While we prefer to do this drill in a bunker, any ground that’s soft enough to show you visible lines will work!
Butt Against the Wall Impact Drill
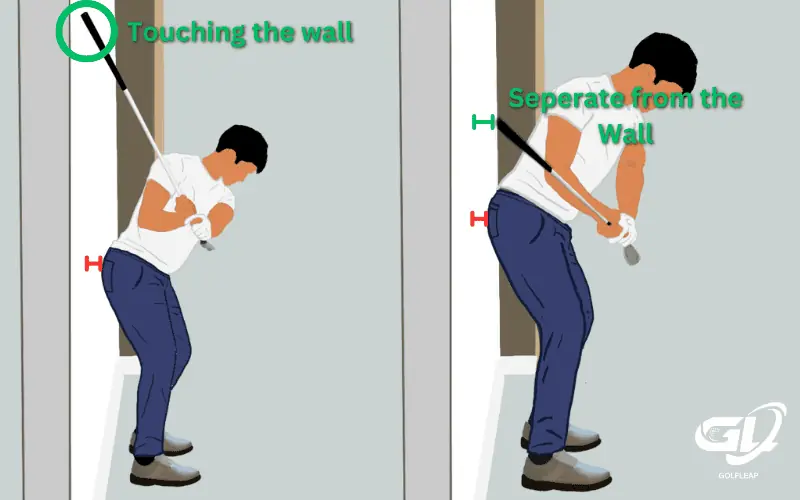
Do you struggle with a classic “over the top” impact position that causes poor contact and sliced golf shots?
If so, the “Butt Against the Wall Drill” will cure your downswing to impact position in no-time!
- Start this drill by creating a fist and placing it behind your lower back while your back is facing a wall. This creates the perfect width to stand from the wall for the drill to work properly.
- Turn your club upside down and create your top of the backswing position with the grip resting against the wall.
- Make your downswing while keeping the grip against the wall and working down where eventually the grip will come off the wall.
- Finish your swing to the impact position.
This drill helps keep your downswing working on a neutral plane and helps players feel where their hands and trailing elbow should be through impact (with a tucked trailing arm) for straighter golf shots or even draws once you start making real swings!
